前面尝试使用 Lean OpenWRT 源码编译 x86_x64 旁路由固件,顺利折腾成功,反正需求简单,于是再尝试使用 op 官方源码加上 Lean helloworld 插件编译。
备用节点:大哥云、万城v-city、飞机云、搬瓦工JMS、极客云、魔戒……
前言
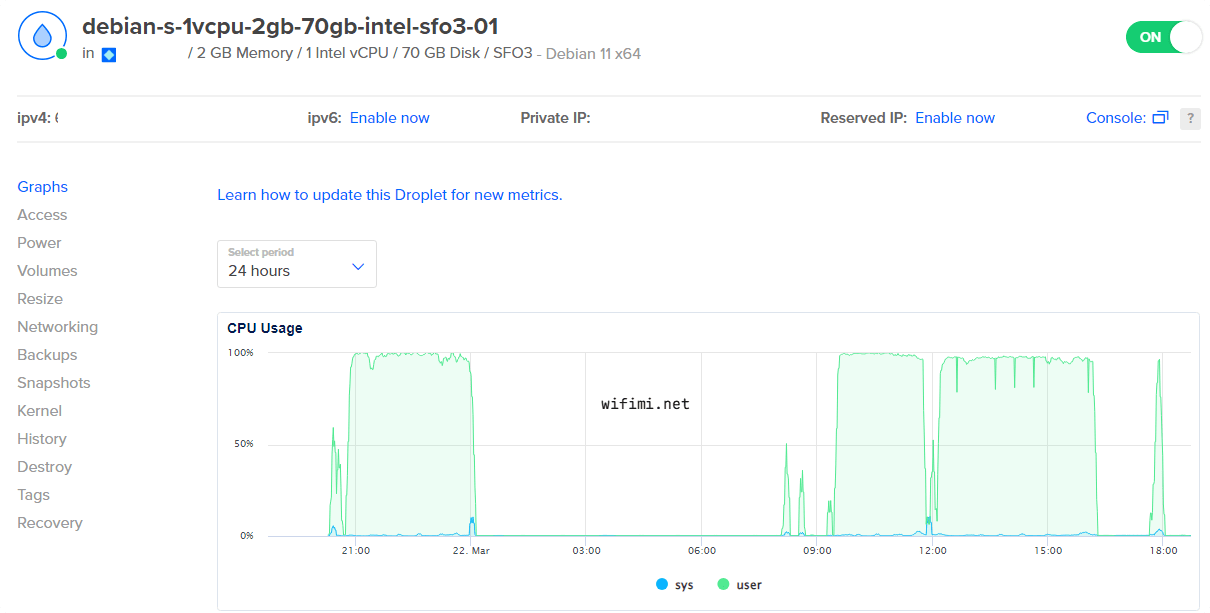
与前面编译环境类似的配置:DigitalOcean VPS 2 GB Memory / 1 Intel vCPU / 70 GB 硬盘,Debian 11 x64 系统,San Francisco 03 机房。
当然,配置越高越好,编译速度越快。下面整理、记录一下编译步骤。与前面 Lean 源码编译大同小异。
使用 OpenWRT 官方源码编译 x86_x64 软路由固件教程
不要使用 root 用户进行编译
国内用户编译前最好准备好科学加速固件
固件默认登陆 IP 192.168.1.1 密码 password
安装依赖
执行代码更新系统,安装必要依赖组件:
sudo apt update -y
sudo apt full-upgrade -y
sudo apt install -y ack antlr3 asciidoc autoconf automake autopoint binutils bison build-essential \
bzip2 ccache cmake cpio curl device-tree-compiler fastjar flex gawk gettext gcc-multilib g++-multilib \
git gperf haveged help2man intltool libc6-dev-i386 libelf-dev libfuse-dev libglib2.0-dev libgmp3-dev \
libltdl-dev libmpc-dev libmpfr-dev libncurses5-dev libncursesw5-dev libpython3-dev libreadline-dev \
libssl-dev libtool lrzsz mkisofs msmtp ninja-build p7zip p7zip-full patch pkgconf python2.7 python3 \
python3-pyelftools python3-setuptools qemu-utils rsync scons squashfs-tools subversion swig texinfo \
uglifyjs upx-ucl unzip vim wget xmlto xxd zlib1g-dev
添加 swap
4G 以下内存建议先添加 swap,要不然大概率编译失败。 root 用户下执行如下命令添加 4G swap 虚拟内存:
fallocate -l 4G /swapfile && chmod 600 /swapfile && mkswap /swapfile && swapon /swapfile && echo "/swapfile swap swap defaults 0 0" >> /etc/fstab && echo "vm.swappiness=10" >> /etc/sysctl.conf && sysctl -p创建用户
创建一个用户名为 lede 的用户并指定 bash 为终端:
sudo useradd -r -m -s /bin/bash lede给用户 lede 设置密码:
sudo passwd lederoot 用户下编辑用户权限:
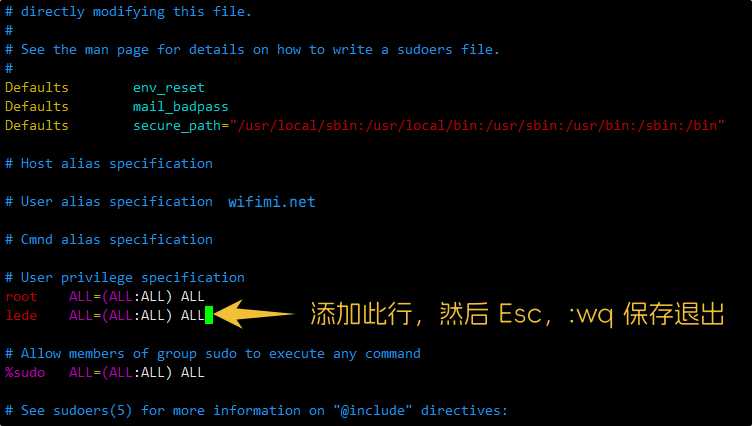
sudo vi /etc/sudoers在 User privilege specification 加入与 root 用户相同权限,按 Esc,然后 :wq 保存并退出编辑。
切换到 lede 用户:
su lede
cd ~
克隆 lean openwrt 源代码到 vps
官方 Git:https://git.openwrt.org/openwrt/openwrt.git
Github 镜像:https://github.com/openwrt/openwrt
# 下载源码(-b 指定分支/标签、 --single-branch 仅下载单个分支/标签、 --depth=1 只下载最新一次提交)
git clone -b v23.05.2 --single-branch --depth=1 https://github.com/openwrt/openwrt.git
修改 feeds.conf.default 配置文件
如果需要 ssr plus 等科学插件,可参考 编译 Lean 版 OpenWRT 找不到 helloworld 插件怎么办? 文章修改配置。
把下面这行代码添加到 feeds.conf.default 文件最后:
src-git helloworld https://github.com/fw876/helloworld.git没有需求可跳过。
更新 feed 订阅
cd openwrt/
./scripts/feeds update -a
./scripts/feeds install -a
进入 menuconfig 配置
输入命令、回车:
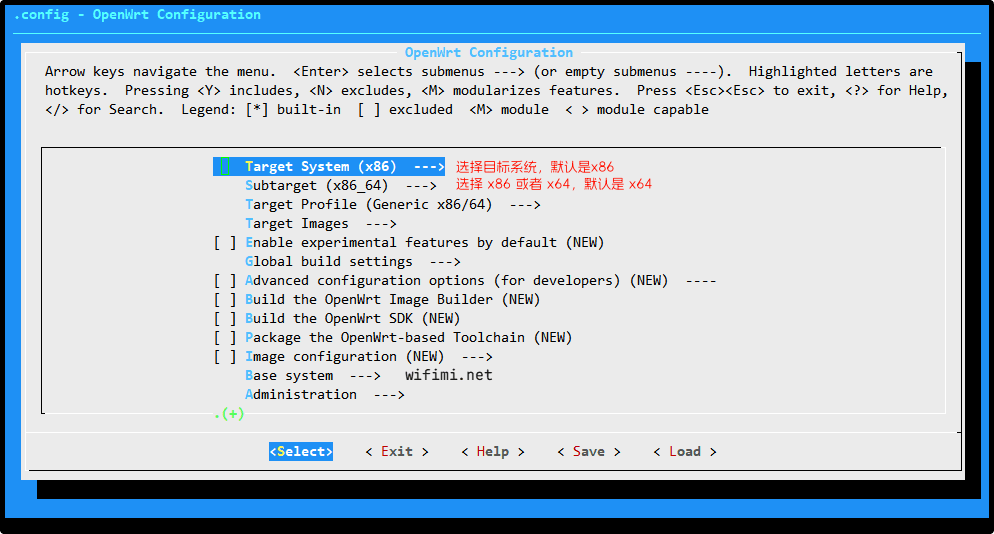
make menuconfig稍等一会,出现如下菜单:
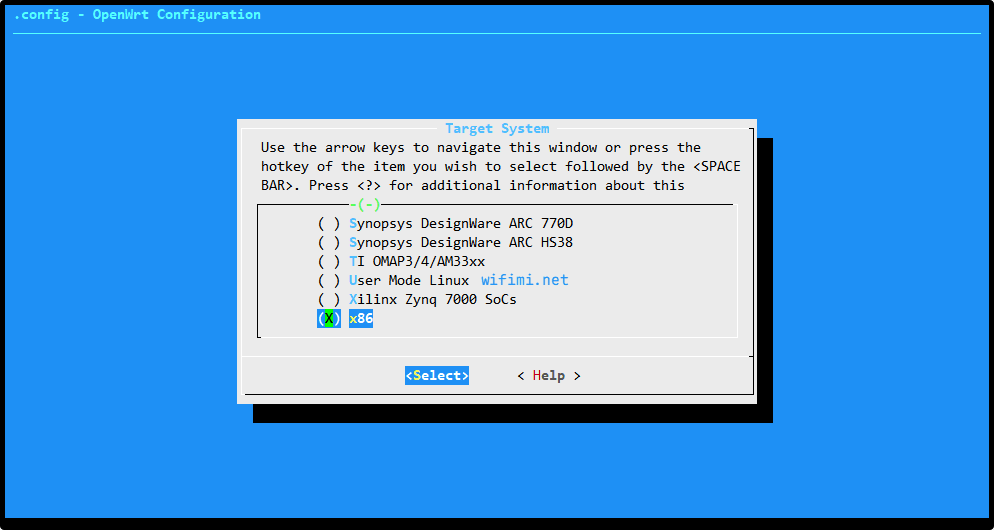
进入 Target System(x86)选择需要编译的平台,默认是 x86:
温馨提示:如果此处按回去不能进去下级菜单,把 shell 窗口拉大一点,太小会一闪而过。
按键盘上下方向键移动,高亮位置按「空格」,前面 x 表示选中需要编译的平台。
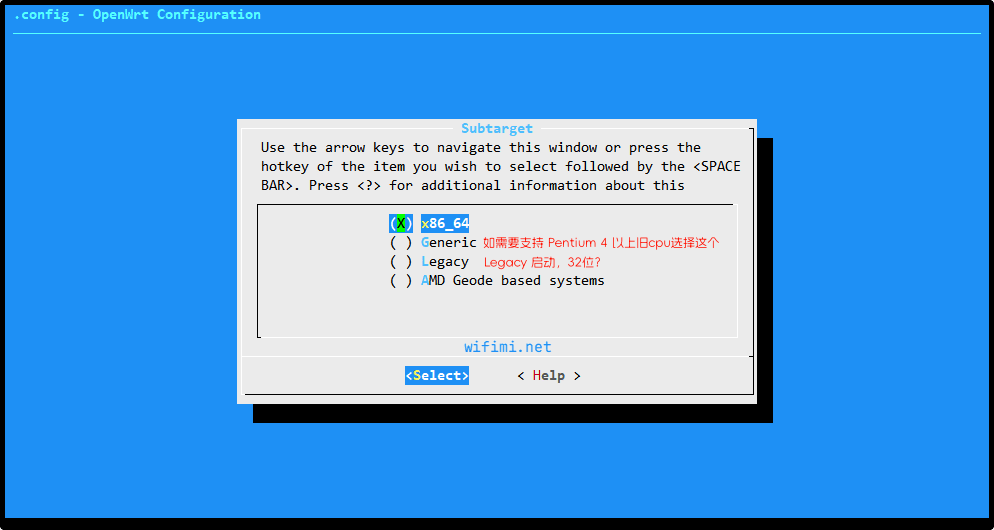
接着到 Subtarget(x86_x64)选择 cpu 子选项,默认是 x86 64 位:
如果需要支持旧 cpu 选择 Generic,或者 Legacy 启动。
Target Profile 默认 Generic x86/64 。
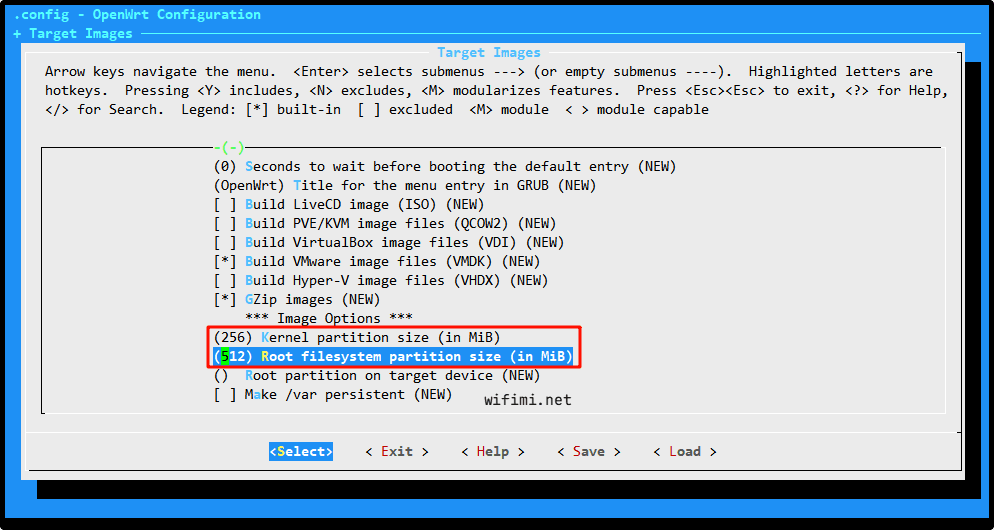
进入 Target Images 勾选你需要的固件格式、分区大小等(默认就有 img 、 vmdk 等格式)
# 添加较多插件时,为了避免空间不足,建议修改下面两项默认大小(x86/64)
Target Images --> (16) Kernel partition size (in MB) # 默认是 16MB,可修改为 256
Target Images --> (400) Root filesystem partition size (in MB) # 默认是 400MB,可改为 512 或者更大
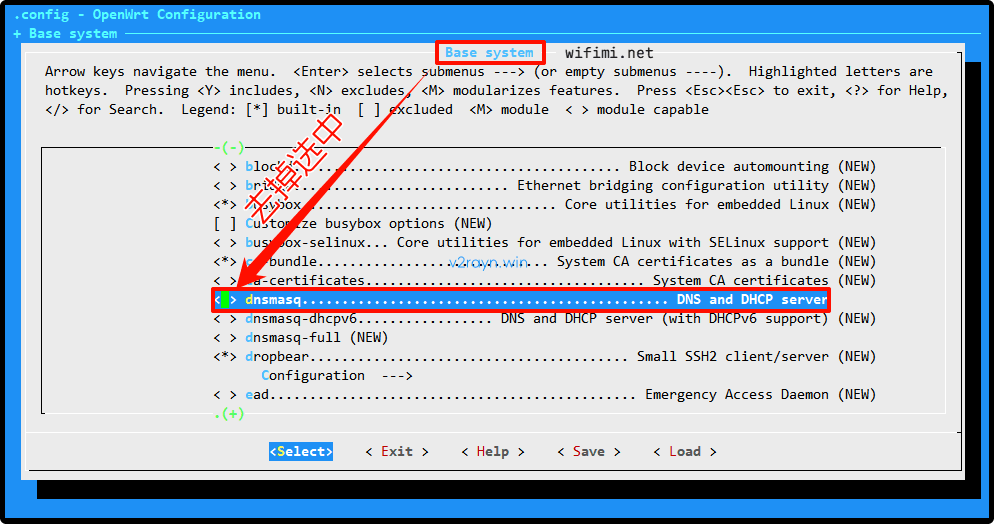
接着在 Base system 取消 dnsmasq,否则会编译失败,提示 But that file is already provided by package * dnsmasq 错误:
* check_data_file_clashes: Package dnsmasq-full wants to install file …… -dnsmasqsec
        But that file is already provided by package  * dnsmasq
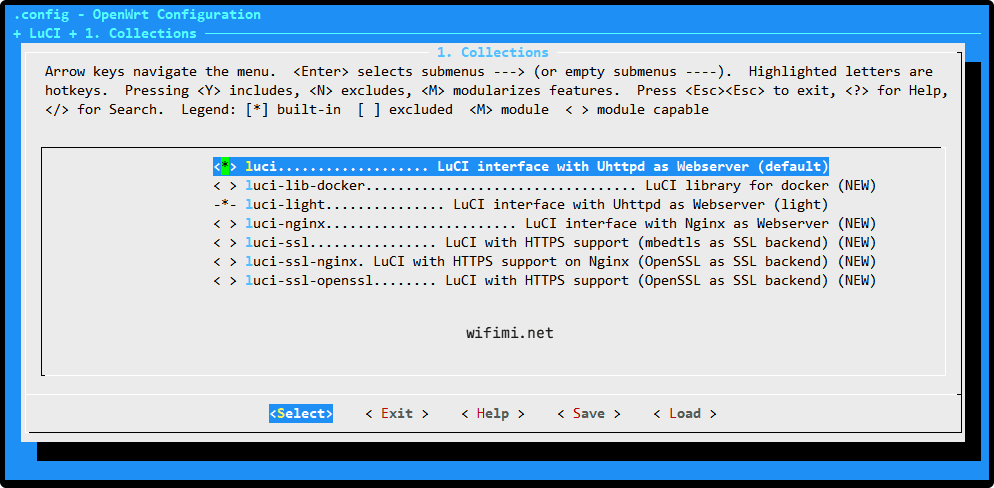
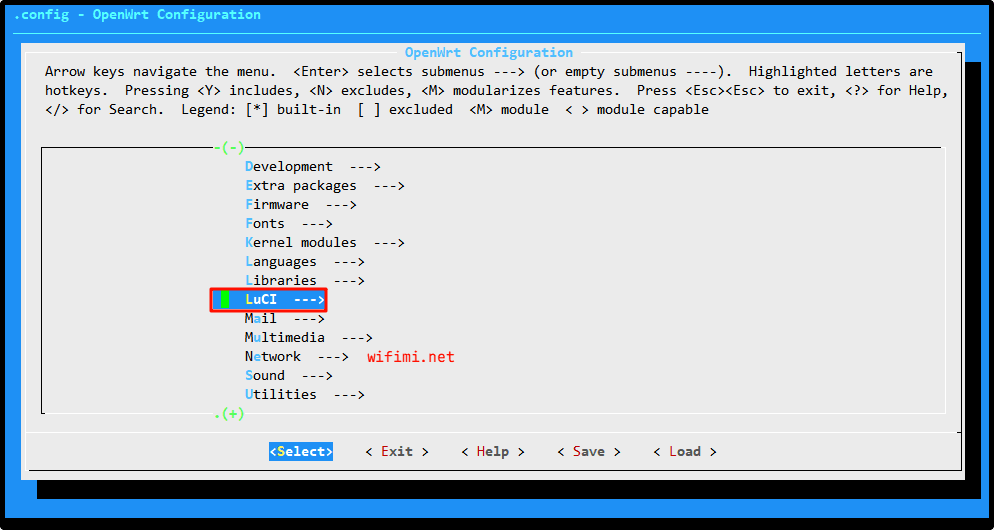
进入 LuCI –> Collections,选中 luci,官方编译默认没有 LuCI,否则无法进入管理页面:
为什么 openwrt 进不去管理页面?
路由器 ip 能 ping 通,就是无法进去 op 管理页面,怎么办?
如果是使用官方源码编译,默认是没有安装 luci,所以无法登录……可以尝试 ssh 登录 openwrt 执行如下命令安装,不过建议重新编译上
opkg update && opkg install luci
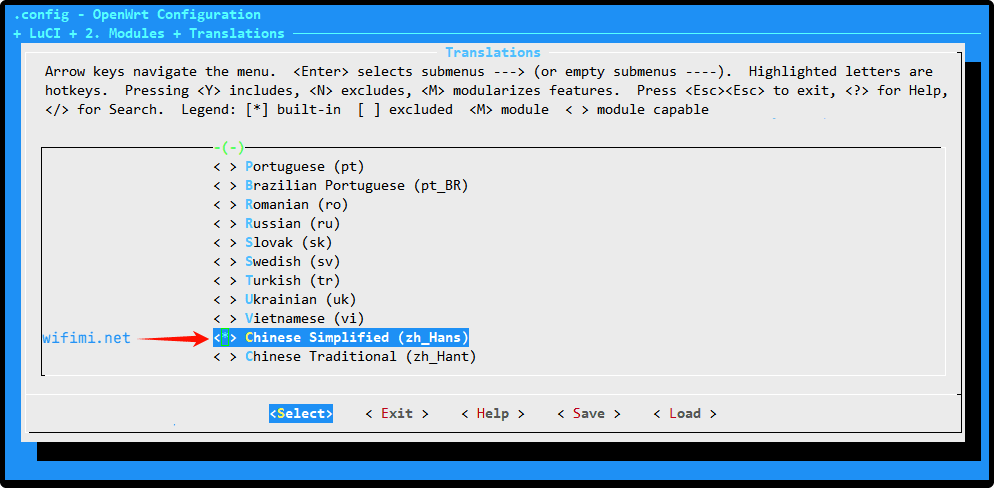
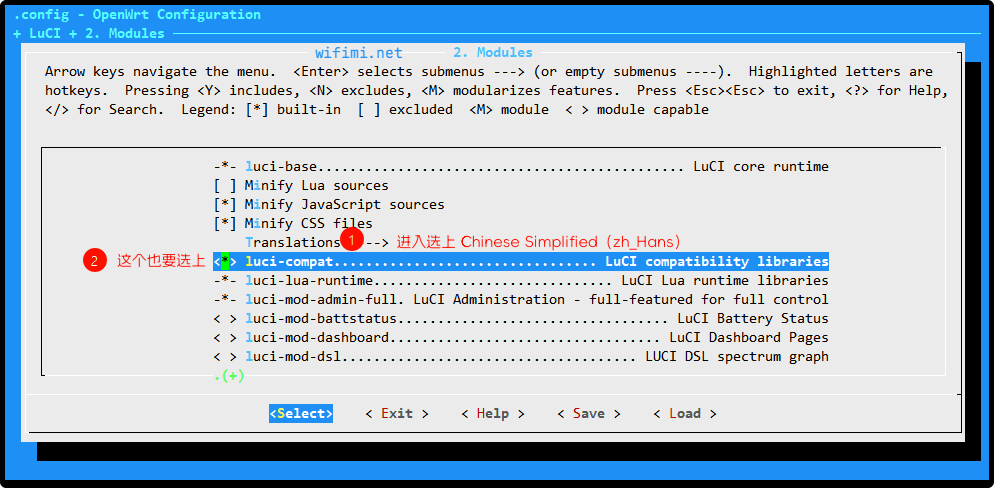
进入 LuCI –> Modules,Translations 中选中 Chinese Simplified,中文界面,否则默认英语:
LuCI –> Modules 里面 luci-compat 也要勾上:
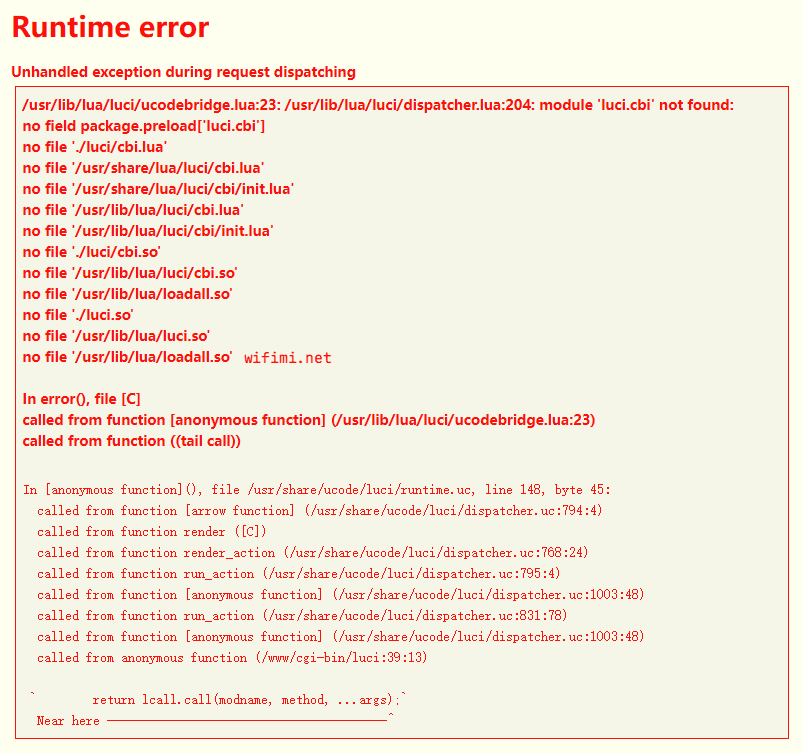
否则在后台进入 ShadowSocksR Plus+ 服务会提示 Runtime error module 'luci.cbi' not found 错误
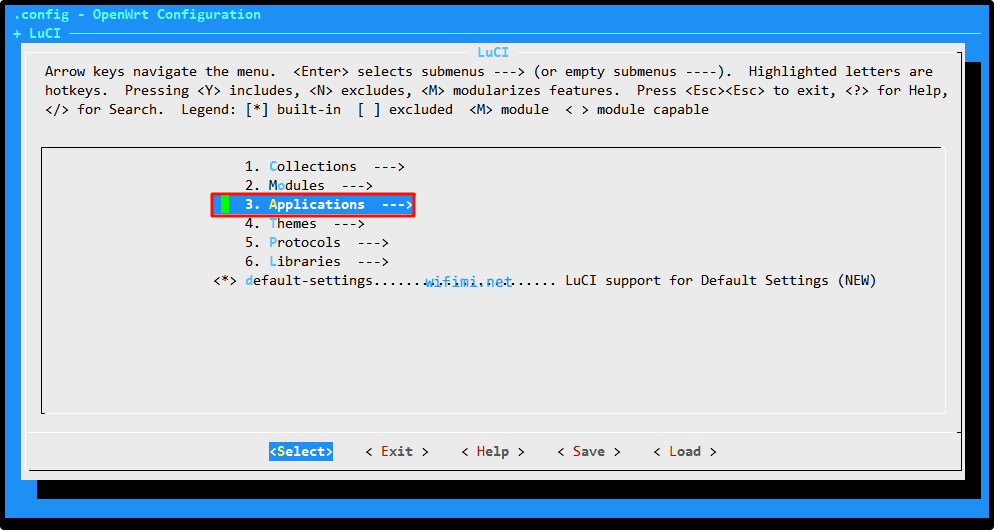
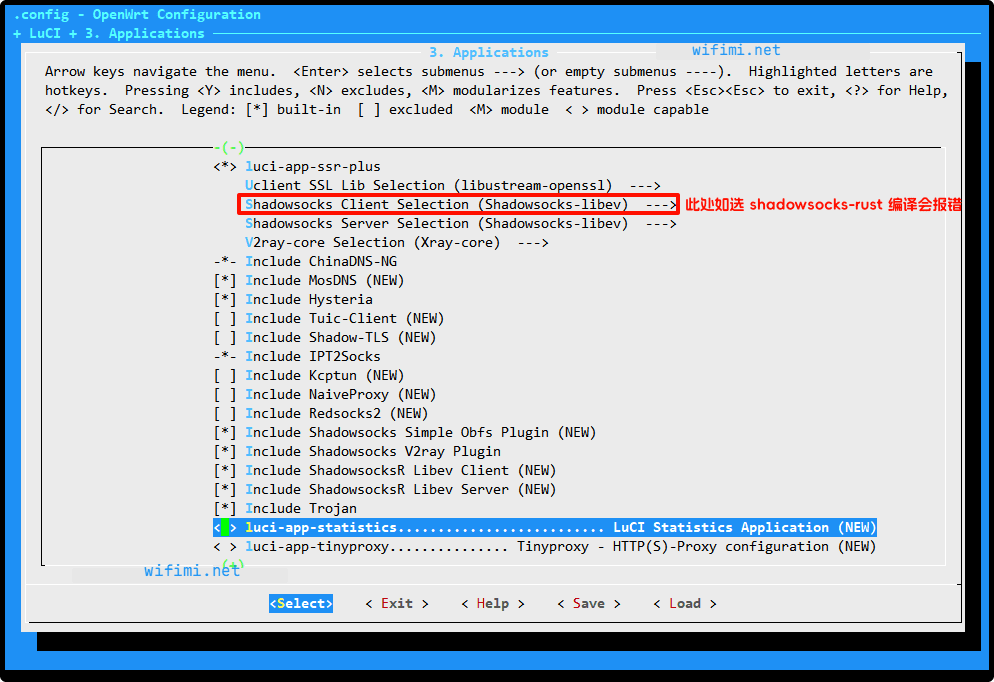
接下来是编译固件最核心部份,选择需要编译内置的插件,进入 LuCI –> Applications 内选中、取消插件。
操作提示:按 Y 勾选,N 取消勾选,M 编译而不安装,连按两次 Esc 键返回上一界面, 代表编译内置固件, 表示编译成模块或者 ipk 包, 则不编译 ) 。
如果跟博主一样没啥特殊需求,默认配置即可,检查一下 luci-app-ssr-plus (NEW) 是否选中编译,下面是参考配置:
注意,此处如果选中 shadowsocks-rust 编译会报错 error: failed to download llvm from ci:
Copying stage0 library from stage0 (x86_64-unknown-linux-gnu -> x86_64-unknown-linux-gnu / x86_64-unknown-linux-gnu)
downloading https://ci-artifacts.rust-lang.org/rustc-builds/8460ca823e8367a30dda430efda790588b8c84d3/rust-dev-1.73.0-x86_64-unknown-linux-gnu.tar.xz
curl: (22) The requested URL returned error: 404

error: failed to download llvm from ci

    help: old builds get deleted after a certain time
    help: if trying to compile an old commit of rustc, disable `download-ci-llvm` in config.toml:

    [llvm]
    download-ci-llvm = false

Build completed unsuccessfully in 0:02:56
make[3]: *** [Makefile:104: /home/lede/lede/build_dir/hostpkg/rustc-1.68.1-src/.built] Error 1
make[3]: Leaving directory '/home/lede/lede/feeds/packages/lang/rust'
time: package/feeds/packages/rust/host-compile#264.15#43.07#436.07
    ERROR: package/feeds/packages/rust [host] failed to build.
想手动下载 rust-dev-1.73.0-x86_64-unknown-linux-gnu.tar.xz 又找不到……只好换 Shadowsocks-libev 编译。
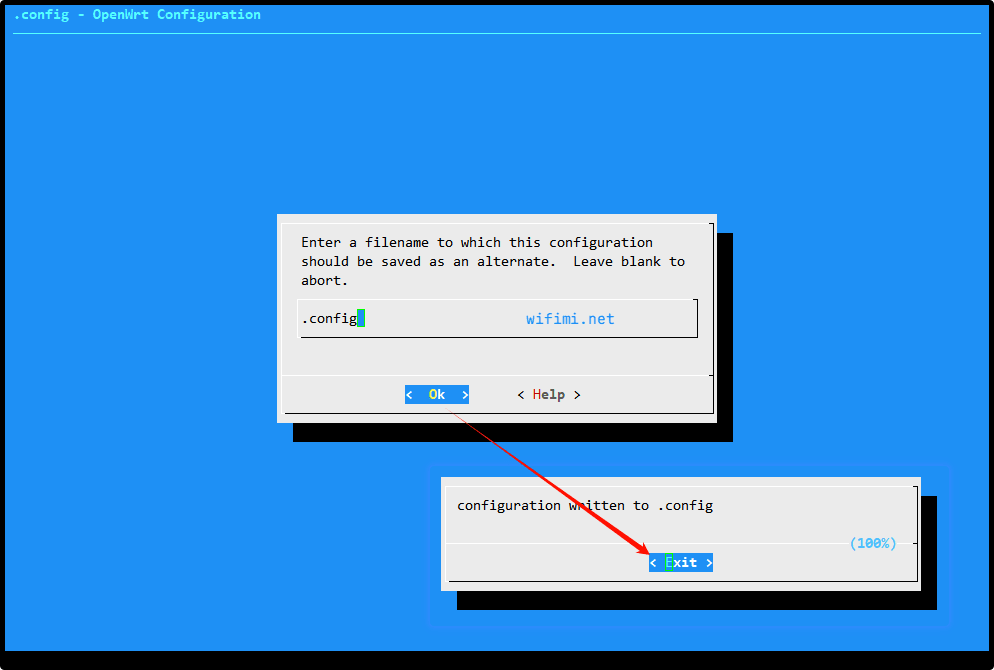
勾选完成,按键盘 → 方向键,高亮 Save,按回车保存配置,默认的文件名称 (.config)保存即可,编译会根据.config 内容编译(若配置错误想要恢复到初始配置,删掉.config 文件重新配置即可)。
保存配置后一路按 Esc 返回退出配置界面,直至 shell 界面提示 End of the configuration. 字样:
*** End of the configuration.
*** Execute 'make' to start the build or try 'make help'.
其它配置修改
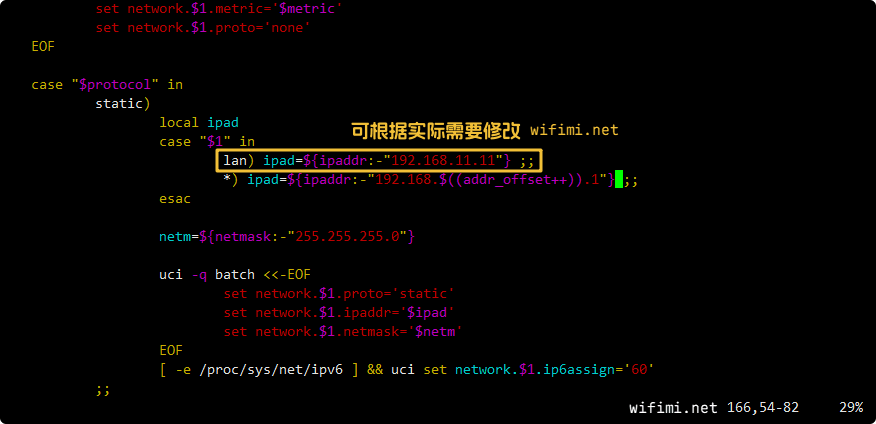
默认管理 IP 为 192.168.1.1 ,可以根据实际需求修改:
# 编辑 config_generate 配置文件
vi package/base-files/files/bin/config_generate +165
# 比如将默认管理 ip 改为 192.168.11.11
lan) ipad=${ipaddr:-"192.168.11.11"} ;;

或者直接使用 sed 命令替换修改:

sed -i 's/192.168.1.1/192.168.11.11/g' package/base-files/files/bin/config_generate
修改完成后效果如下:
修改默认时区
# 编辑配置文件
vi package/base-files/files/bin/config_generate +315
# 时区 UTC 修改为 CST-8
set system.@system[-1].timezone='CST-8'
# 再在下一行添加如下内容
set system.@system[-1].zonename='Asia/Shanghai'
修改固件 root 密码
默认无密码,如需要可修改 shadow 文件添加密码即可:
vi package/base-files/files/etc/shadow把密码添加到 root:和:中间即可。
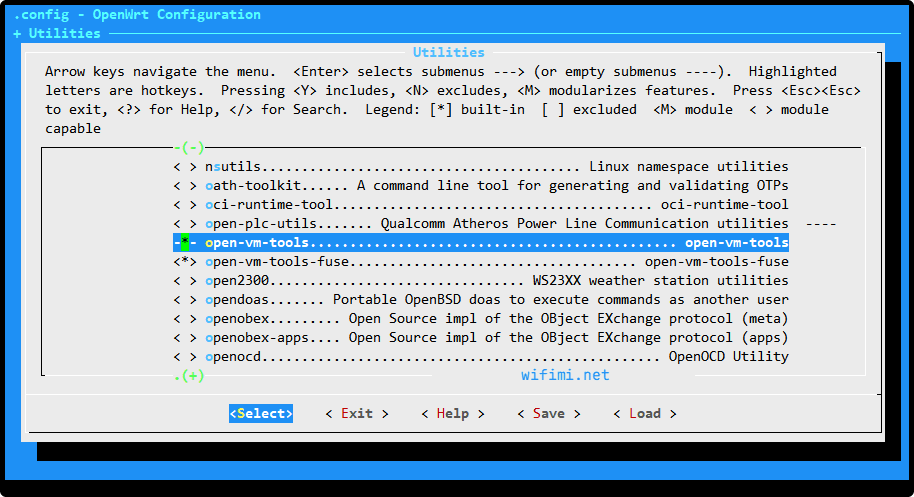
添加适用于 VMware 或 PVE 工具
# VMware
Utilities  --->  open-vm-tools
Utilities  --->  open-vm-tools-fuse

# PVE
Utilities  --->  Virtualization  --->   qemu-ga
开始编译
可能需要安装一下 screen,开启 screen 编译,以防 ssh 断线,可让编译在后台持续运行;screen -r 可返回之前对话窗口。
apt-get -y install screen
screen -S op
make download -j1 #先下载
make -j1 V=s
-j1 代表用单线程编译,V=s 代表输出全部过程,第一次编译建议使用单线程,国内请尽量全局科学上网。
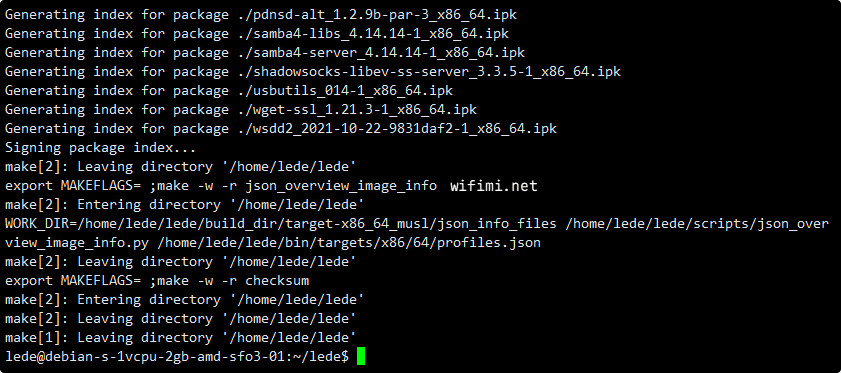
编译完成:
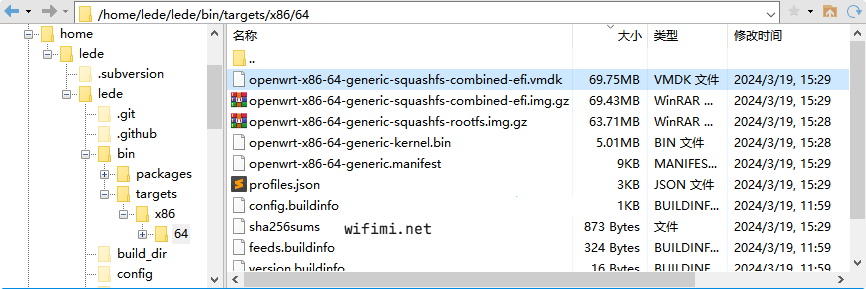
进去 /home/lede/lede/bin/targets/x86/64 目录下载固件:
Lean OpenWRT 再次编译
如 Lean 源码更新,需再次编译,可按照下面方法操作:
cd lede  #进入 LEDE 源码目录
git pull  #同步更新 Lean 源码
./scripts/feeds update -a && ./scripts/feeds install -a  #更新 FEEDS
rm -rf ./tmp && rm -rf .config  #清除编译配置和缓存
make menuconfig  #进入编译配置菜单
make download -j1 #先下载
make -j1 V=s #n=线程数+1,如 10 核 16 线程 i5 cpu 可填 -j17另外,需要注意,磁盘空间不能太小,建议至少 50G 起步。
使用 OpenWRT 官方源码编译,因为前面两个报错,折腾几次才编译成功:
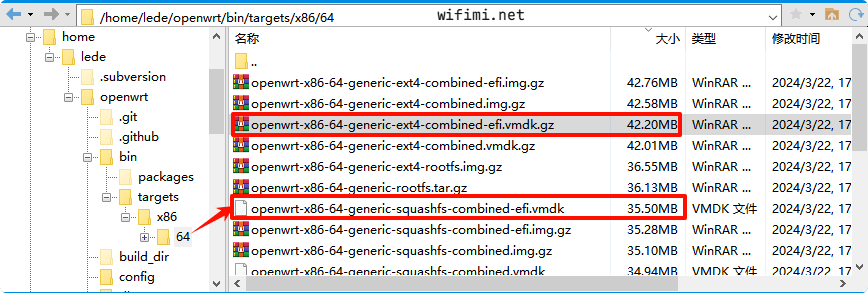
不过使用官方源码编译出来的固件体积更加小,不到 Lean 代码的一半……应该是组件更加少,更精简:
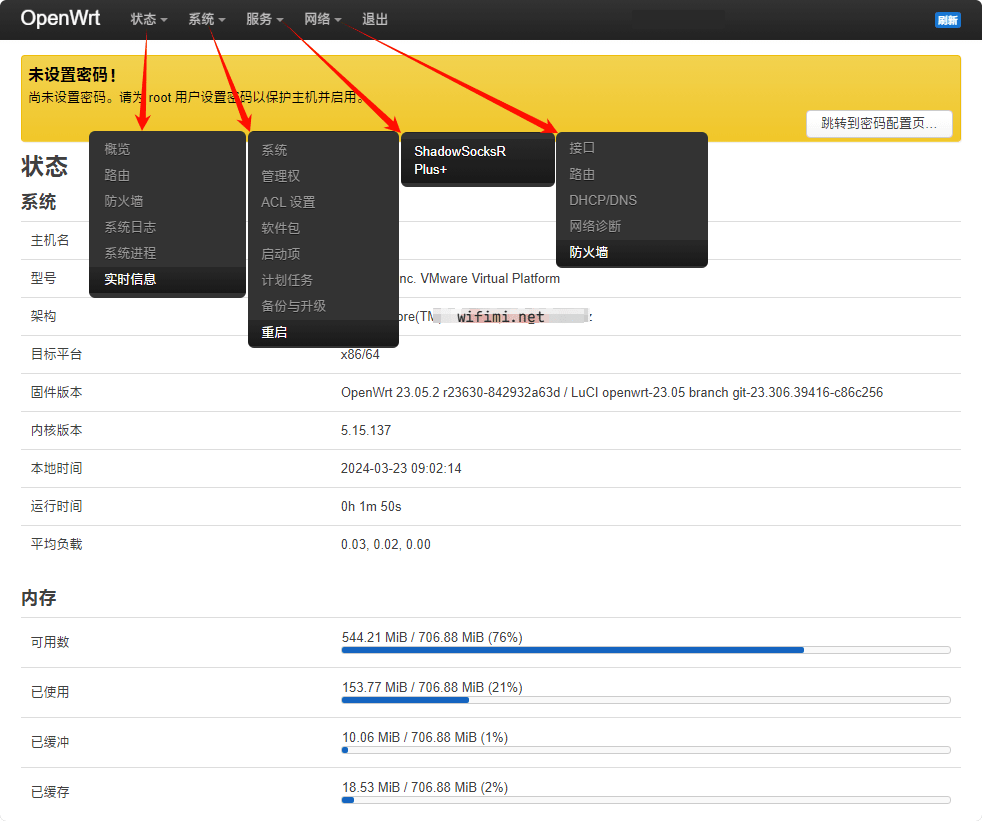
官方源码编译出来的固件默认后台地址是 192.168.1.1,用户名 root,无密码,根据上面配置编译出来的固件,VMware 版本不到 40M,几乎没有多余的功能了,旁路由十分适合:
参考资料:
解压密码 1024 | 任何服务均有跑路风险,请注意防范!没有啥绝对好坏!
备用节点:大哥云、万城v-city、飞机云、搬瓦工JMS、极客云、扬帆云、魔戒……
本文已于 2025-09-01 修改更新,您的宝贵建议请在文章下方评论区留言反馈,谢谢。

《使用OpenWRT官方源码编译x86_x64软路由固件记录》留言数:0